As any silversmith knows, silver solder is the ideal material to use
when joining sterling pieces by the traditional method of brazing.
Sometimes I will receive an object which has been lead-soldered in
the area in need of repair (or re-repair). Sometimes the joined area
is not visually accessible, and I don't know if lead has been used.
In either case, I cannot use silver solder because the high
temperature required will melt any lead in the joint and allow it to
form its own alloy with the silver. Not pretty! And, using a low
temperature tin/silver solder won't give me a sound joint or good
silver color. For this reason, I had been exploring newer
technologies for joining metals. I tested laser welders from a few
manufacturers, but found that their compartments are too small for
working on holloware. In addition, they are expensive to buy and
notoriously expensive to repair, and the down-time for repairs can be
substantial. I also tested the Mini Pulse III (an arc welder) from
Aelectronic Bonding, which had too few welding power options and
didn't allow me to get into tight spaces.
I tested a friend's Lampert PUK 2 pulse arc welder for a few months,
and refined my technique to the point where I felt confident to
purchase Lampert's PUK 3s Professional, which was developed to weld
silver more successfully. I was so impressed that I soon purchased
the PUK 3s Professional Plus which had a broader power range,
additional impuse settings, and five programmable settings.
PUK 3s Professional
PUK 3s Professional Plus
Since I use the PUK on a daily basis, it was only natural to upgrade
again to Lampert's latest model: the PUK04, which has the following
advances over the previous models I've owned. Features in bold were
the most important to me:
• Touch-screen programming.
• Smaller footprint;
• Exclusive "soft start" pulse for even cleaner
welds and less electrode tip embedment;
• Substantially less cracking when welding and using filler wire
for an even stronger weld;
• Minimum impulse setting: .5 milliseconds –
critical for ultra-thin metal (the PUK 3s Plus: 3ms);
• 33 programmable settings (the PUK 3s Plus: 5);
• Three LED intensity settings.
PUK04
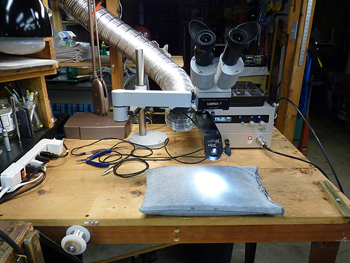
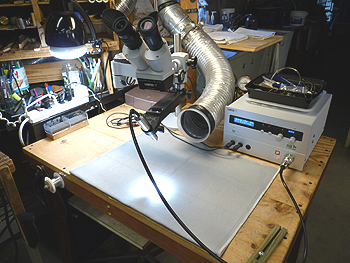
Above: As with every PUK I've owned, this latest model also
sits to the right of my main bench where I can pivot left to get
access to my abrasive and burnishing tools. I set up ventilating
behind the welding area to capture all metal fumes. Venting or using
the optional smoke absorber is a
necessity, as with all other forms of welding which produce metal fumes.
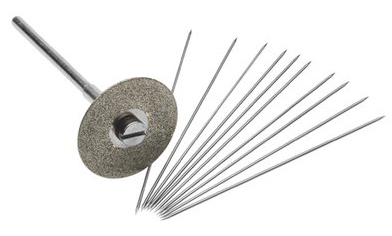
The electrodes
The 10 electrodes come pre-sharpened on both ends. I wait until I
have used all 10 electrodes (20 tips) before sharpening them at the
same time with the supplied mandrelled diamond disk. This saves time.
I mount the disk in my Foredom handpiece and secure it to the bench
over the dust collecting vent. The recommended tip angle is 15%.
Electrode replacement in the PUK handpiece can be accomplished within
five seconds.
Advice on welding larger objects
Whether it be pulse arc or laser, welding isn't meant to substitute
for brazing large objects. Welding long seams (e.g., on coffeepots or
candlesticks) is more time-consuming than simply using the welder to
tack a seam in preparation for brazing.
If attaching parts to large bearing surfaces (e.g., a large finial to
a coffeepot cover), it's best to tack the part in place, then use the
capillary action of torch-brazing to fill the void. Always consider
the time it will take to weld or braze and the subsequest clean-up.
The handpiece can be removed in three seconds for welding freehand.
PUK04
Lampert pulse arc welder highlights
Uses
the same alloy as the piece being created or repaired (no color
issues as with solder); Tacking
eliminates the shifting of joints and the time involved in wiring-up
an object; Repair
objects without harm to stones or patinas; Attach
findings without losing metal hardness; Work
on material as this as .001"; No
firescale or firestain due of argon protective atmosphere; Localized
heat won't melt nearby joints or damage stones; Fill
in porosity with the same alloy; Simple
and intuitive to operate; Certified
product safety: GS & CE marks; DIN
CERTCO certified eye protection in the microscope lens; Ergonomic
for work efficiency; Maintenance-free; Small
footprint – fits into every workshop; Very
low costs of consumer materials (electrodes); Extremely
low argon consumption; Touch-screen
operation; Easy-on,
easy-off handpiece nozzle when changing electrodes; System
add-ons include the PIN module, welding smoke absorber, and foot pedal; Built
in Germany with attention to the minutest detail – you can see
and feel the quality; 3-year
warranty!
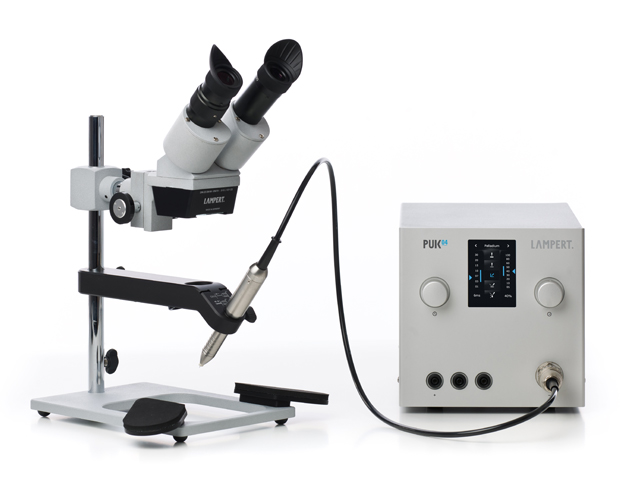
The basic cost for the PUK04 is $5,295. It includes:
• PUK unit and microscope;
• Three different contacts (pliers, locking tweezers, and
alligator clip) for attaching to your work;
• Handpiece;
• Welding mat;
• Microscope cover;
• 10 thiorium-free electrodes with diamond disk sharpener;
• Metal compactor;
• Brass brush to remove any oxides or soot that may form on the
piece you're welding. This will free-up your flexshaft for other accessories.
Optional accessories I added:
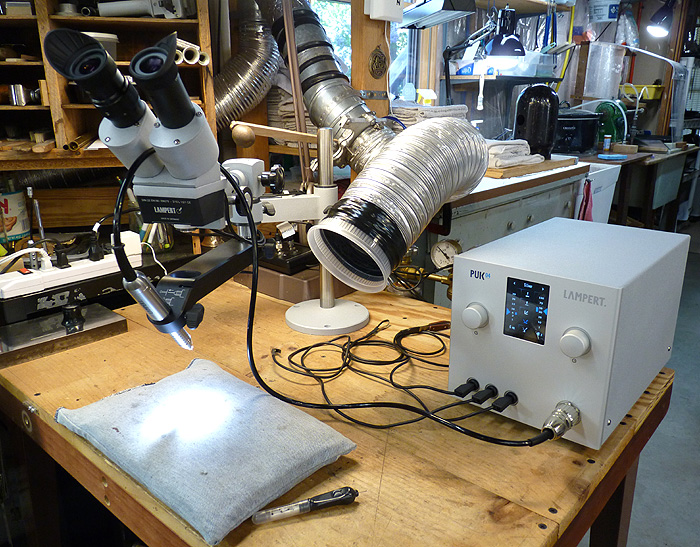
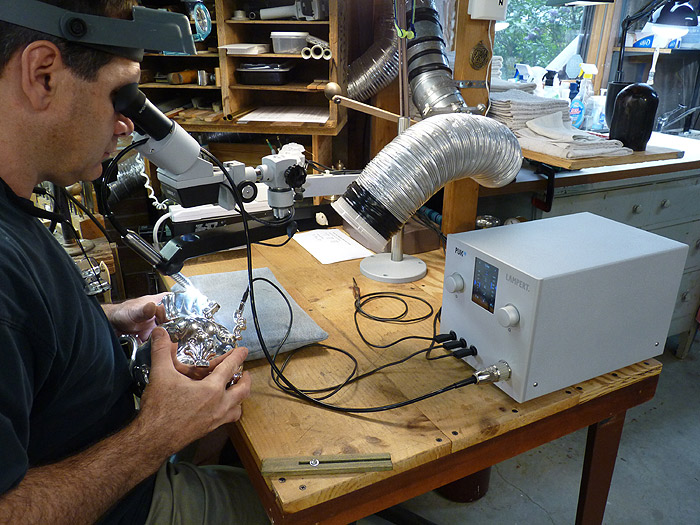
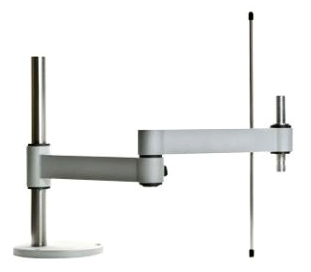
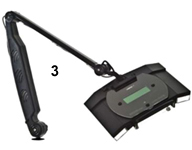
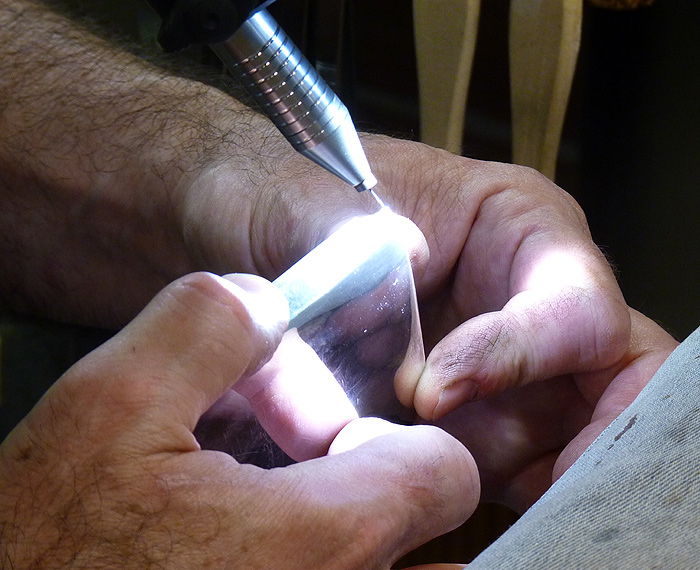
The articulating arm ($575) allows me to work on larger objects
underneath the microscope. See it in use here.
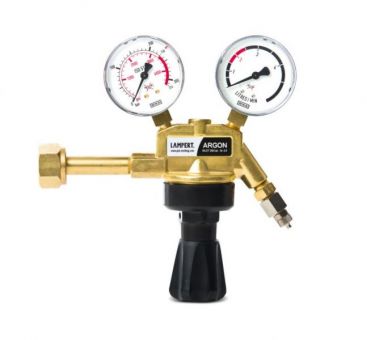
The precision regulator ($135).
When I was using the PUK 2, I tried a couple of different (and less
expensive) argon regulators that weren't nearly as accurate as the
one from Lampert. Most argon regulators are made in China and have
graduated indicators that are too close together and/or have poor
adjustment sensitivity, and very poorly made (I returned two
regulators before springing for the Lampert model). A regulator that
doesn't give accurate readings can lead to poor welds and wasted gas.
The PUK regulator is very well made and has more widely-spaced
indicators to better indicate exactly how many liters per minute of
gas is flowing. Though it's priced at $135, it's a wise investment in
German quality.
Argon gas, which protects the weld from developing oxides, is the
other expense for running the PUK. Without gas, the PUK won't run
(and you would never produce a successful weld without it, regardless
of your chosen welding apparatus). To reduce the cost of argon, I
would advise leasing a 300-cubic-foot cylinder (5' tall x 10"
diameter). I'm paying $86 per refill plus $50 for the yearly lease.
Argon purity of at least 99.97% is recommended by Lampert. The
industrial argon I'm using from my local Airgas
company is 99.995% pure.When welding silver, I run the PUK on 1-2
liters of argon per minute.
Additional electrodes – each set supplied with a diamond grinder
and case ($45).
Additional optional accessories
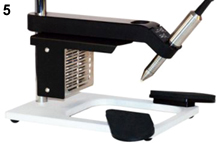
Pin module for welding ear studs
Welding wire (variuos alloys available)
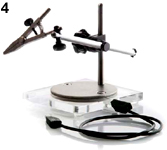
Magnifying lens
Third hand
Welding smoke absorber (highly recommended if you have no localized
ventilation)
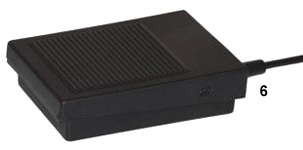
Foot pedal
Conclusion
Using this relatively new technology has broadened my scope of
options when joining metals. I can mend a pinhole with a dollop of
sterling, dress it down, and give it a quick polish without
disturbing the patina. The end result: absolutely no indication the
piece was repaired - the color is perfect! I can repair a bezel
surrounding a piece of glass without removing it. Normally I would be
forced to unmount the glass, possibly damaging it in the process. I
even used the PUK to weld a steel wire to the end of a hardened steel
pin that was buried in a candelabra stem. I heated the stem, melting
the lead solder, and pulled the pin out. How slick is that?
When I say I use the PUK every day I'm working, I'm not exaggerating.
It was the most prudent (and expensive) purchase I've ever made for
my shop, but it's already paid for itself. Once you own this little
gem, it will open a whole new world of possibilities. Oh, another
plus: it's great fun to use!
Lampert Tools USA
Robert Sepiashvili
67 East Madison, # 512
Chicago, IL 60603
866/4PU-K111 (866/478-5111)
Suppliers
USA
A&A Jewelry Tool
(Los Angeles, CA)
BTI/Landa (Miami, FL) Gesswein (Bridgeport, CT) Kassoy (New York, NY) Otto Frei (San
Francisco, CA) Rio Grande (Albuquerque, NM)
Uptown Material House (New York, NY)
5/10/2012: Welding Objects That Flex
I often receive broken sterling flatware for restoration. Welding
these stamped (hardened) pieces back together will result in cracking
on either side of the weld due to the flexing of the utensil. This is
due to differences in grain structure of the stamped object and the
welded filler wire. I recommend using a mini-torch and annealing the
very edges of the break. Then file a v-groove on the backside of the
break and use filler wire (e.g. sterling for a sterling fork) to fill
the groove. This technique makes for a homogeneous connection.
5/5/2012: Argon Consumption
There are many things about the PUK I enjoy. One of those features is
the very low argon consumption compared to other systems. I find that
I can perform 99% of my welding using only 1.5 liters per minute (lpm).
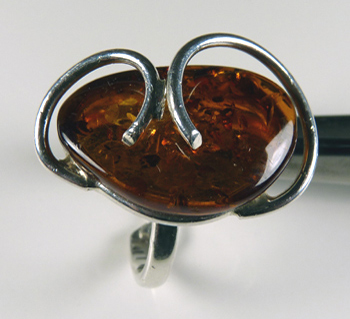
5/5/2012: Sterling & Amber Ring
This is going to blow you away! A friend came to me with an amber and
sterling ring. The amber was glued into the setting with decorative
wires above, only 1/16" from the amber. As you can see below,
the wires had come apart. So, I couldn't remove the stone, and was
forced to weld the wires back together (I would have chosen to weld
them regardless of whether or not the stone could be removed). If I
had used a laser welder and missed the mark, the stone would have
fried. But first, I wanted to try the technique I was about to use on
a sterling jump ring surrounding a piece of plastic. It worked - no
harm came to the plastic. Here's the procedure I used...
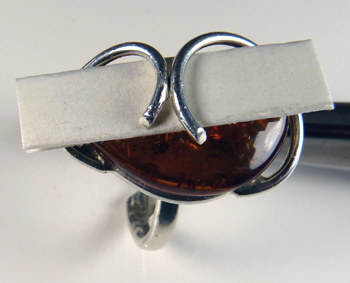
The wires were pried open and the silver solder removed.
The wires were then sprung back together. As a precaution, I slipped
four layers of index card stock between the wires and the amber to
prevent the stone from burning.
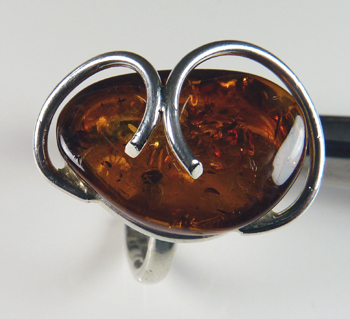
Below are the wires reattached with sterling filler wire. I used the
filler setting with 1.5ms and 30% power.
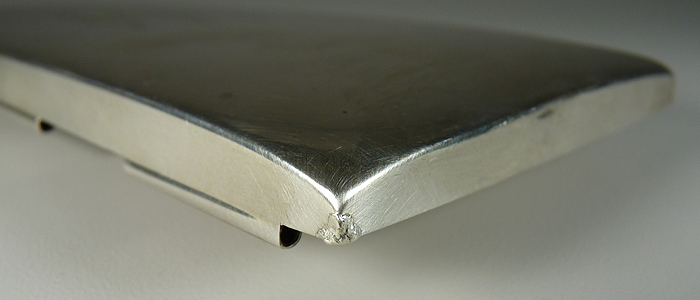
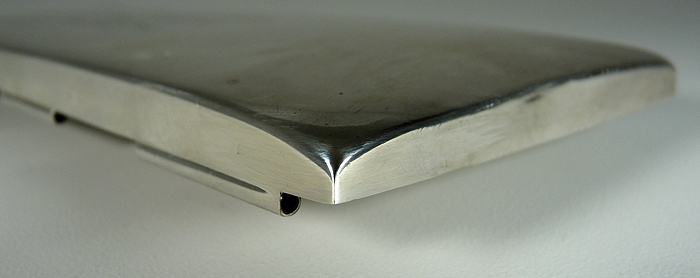
4/16/2012: Sterling Box Cover
This box cover's four corners
were all split. I used sterling filler wire on the inside and
outside, then compacted the material from the outside to remove any
porosity. What appears to be a corner split in the third image is
actually a reflection
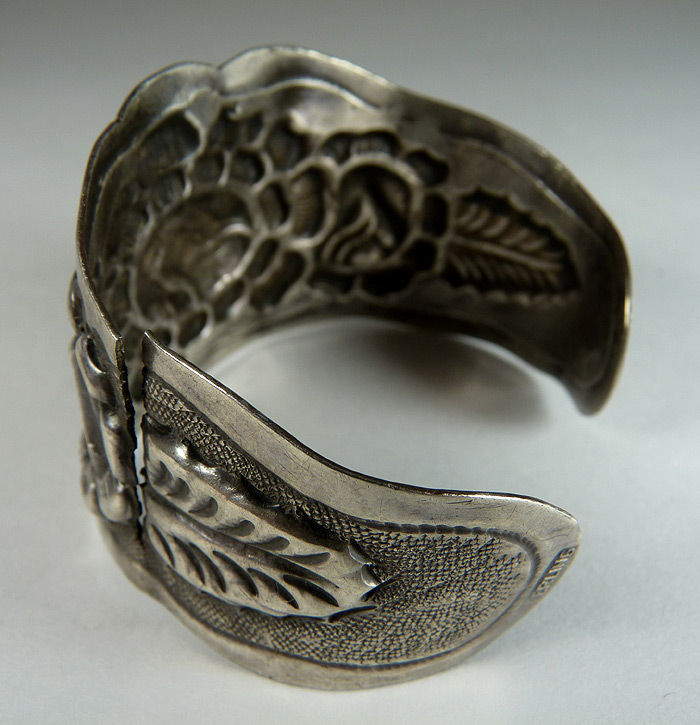
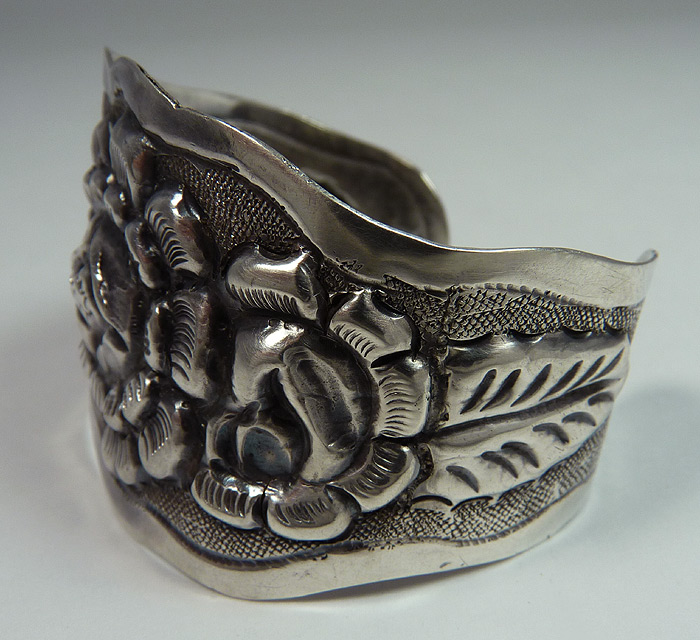
3/25/2012: Sterling Bracelet
This bracelet wasn't the thinnest
piece I repaired with the PUK, but it did present a new issue: How
would pulse arc welding hold up to constant bending?
This was the procedure I used:
The split was thoroughly cleaned,
then beveled on the back side. I used .010" sterling filler wire
and over-filled, spreading and smoothing material on either side of
the break to strengthen the area. If I had not added additional
support, I would see this piece back in my shop in a short time. I
didn't totally compact the filler metal as it would have become too
brittle with the possibility of the split re-opening. I decided to
simply burnish the surface to remove any surface porosity. This left
the filler material a bit more flexible.
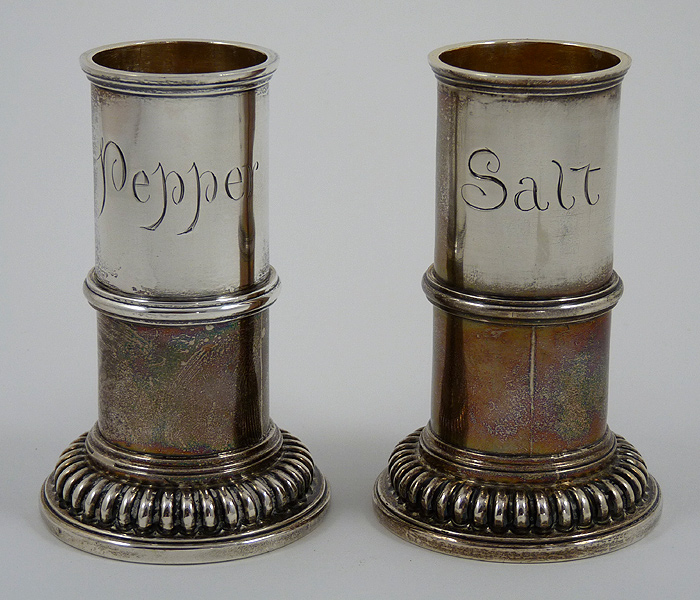
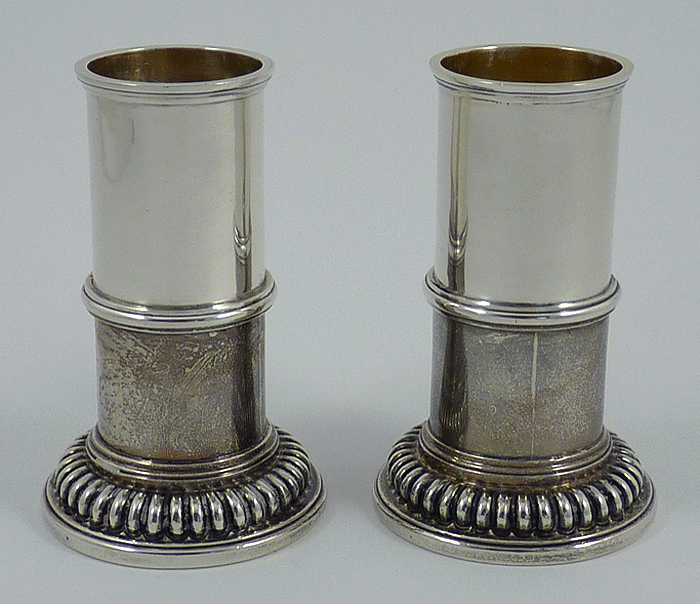
12/30/2011: Sterling Casters
Someone had the clever idea to
engrave these 1730 caster bodies with "salt" and
"pepper." (The tops were left off to show a larger area of
the engraving.) Engraving the function of these pieces is certainly
not something I would have done, but to each his own. Since the
silver was too thin to remove by filing, I used the PUK and sterling
wire to fill it in. When I photographed the "after" image I
had not yet polished the bottom sections of the casters.
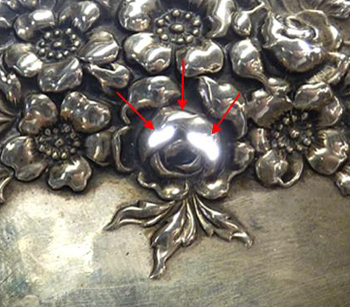
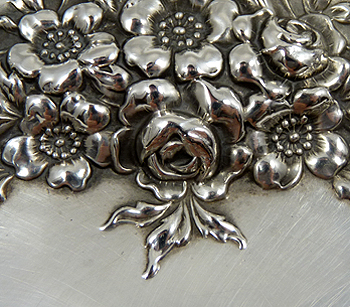
12/11/2011: Sterling
Cut Glass Jar Cover
This 5½" Wallace
sterling cut glass jar cover was stamped and spun out of extremly
thin material. The image on the left shows light coming through three
areas of a flower as well as other areas on the piece. These areas
were worn through from over polishing. The edges of the open spaces
were the approximate thickness of a piece of tin foil (.001"). The
PUK worked beautifully, and I used .25mm sterling
wire for a perfect color match.
11/18/2011: Heat-sensitive Stones Question from jeweler: I recently purchased a PUK Pro welder
and am contemplating a retipping of a Tourmaline. I've completed
several successful repairs upon Diamonds and Rubies but haven't
worked on softer, heat-sensitive gems. Can you share any advice or
point me in the direction of any technical material?
Answer: Tourmalines are inherently fragile stones. Having said
this, there should be no problem rebuilding a prong. Firstly, it is
advisable to try this technique on a practice setting holding a
faceted glass "stone." Use 36-gauge annealed wire
(.005") and the lowest possible power setting on your PUK when
welding. Welding from the outside of the setting (don't let the
electrode pass over the glass), build the prong straight up with the
filler wire. When you're happy with the height of the prong, finish
it and gently push it over the glass.
11/16/2011: Speedwire Welding Wire Dispenser
I just purchased a Speedwire welding wire dispenser – a system
that makes it much easier to weld. I bought the refillable Speedwire
($23) and coiled the sterling wire myself. Speedwire can also be
supplied with pre-installed wire of various precious metal alloyt.
See the Speedwire video here.
For more information and purchasing, go here.
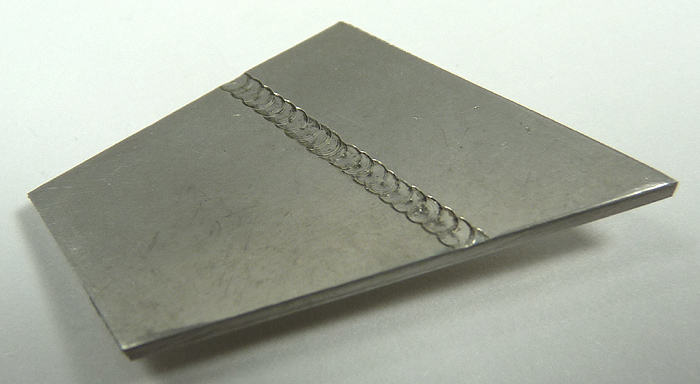
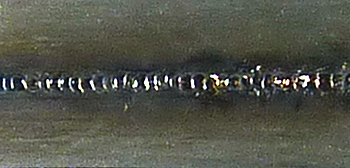
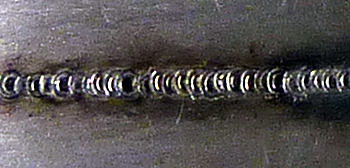
11/4/2011: Standard Sterling & Argentium
I did a comparison test using .030" (0.76mm) sheet standard
sterling and Argentium. I used the gap mode with 6ms and 45% power
for both alloys. The standard sterling (left) had smaller and
slightly rougher welds than the Argentium, and demonstrated more
oxide formation. The actual weld diameter sizes were .030"
(0.76mm) for standard sterling, and .040" (1.02mm) for the
Argentium. Dropping the power to 30% when welding the Argentium gave
the same size diameter weld as the standard sterling.
Conclusion: Argentium gave a cleaner and smoother weld with 30% less
power consumption as compared to standard sterling.
Standard
sterling
Argentium
11/2/2011: Pewter
Today I experimented with welding metals other than the sterling I
normally work with. I cut some lead-free pewter sheet that was
.040" (1.02mm). I filed the edges of each sheet 90 degrees to
make a butt joint. I then used the PUK's gap filler mode with a
setting of 6ms and 35% power, running down the center of the joint
and overlapping each weld 50% I welded the top and bottom of the
joint, with sheet penetration of over 50%. I then sawed through the
joint and used 1200-grit silicon carbide paper to see if there were
any gaps and found none. I folded the sheet on the joint in half from
front to back, then back to front, and found no stress cracking. I
continued the folding back and forth which eventually resulted in
joint failure. This was because the joint was more brittle than the
rest of the sheet. The same failure would have resulted if I had used
pewter solder.
Since I was in an experimenting mood, I used the same PUK settings
and welded the pewter to the aluminum backing of a safety edge blade
with excellent results. The aluminum was then welded to the steel
blade - this, too, was successful.
Two butt-welded pewter sheets (1.125" wide total)
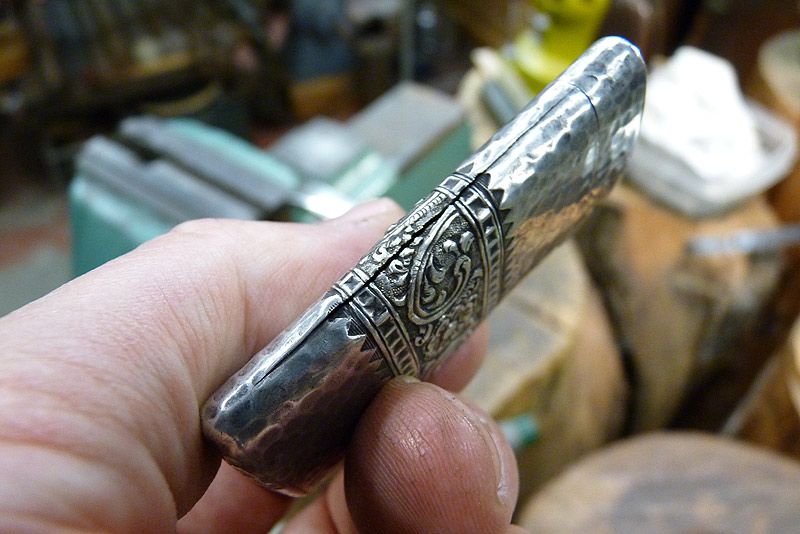
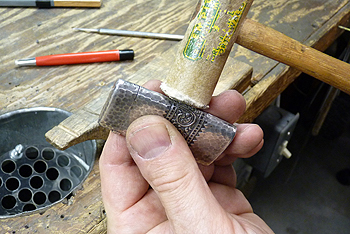
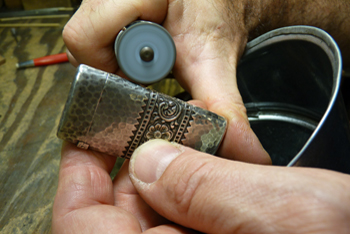
10/15/2011: Gorham Sterling Match Safe (shown repairing the
seam only)
The most tedious repair on this
safe was closing the seam (or joint). The first order of business was
to open the seam to remove any solder. Ultra-fine 0000 steel wool was
used inside to remove any grime around the seam, making the surface
smooth for burnishing.
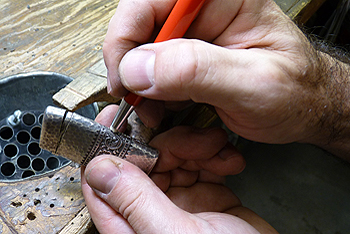
Here I'm raising the seam past
it's normal state, enabling greater access for scraping the seam walls.
This modified dental tool has a
narrow triangular scraper on its end. It is used to remove all solder
in the joint so the filler wire be welded to the clean sterling.
Pulse arc and laser technologies will not fuse successfully to solder
that previously melted. The filler metal will combine with the
existing solder and produce a grainy alloy with a color that doesn't
match the surrounding material.
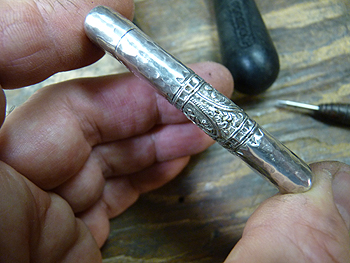
Cleaning around the seam with a
fine glass brush will aid in successfully filling the joint.
The joint is now tapped closed
using a rawhide mallet. There still exists a very slight taper from
the bottom of the seam to the top, which will enable me to deposit
sterling filler wire.
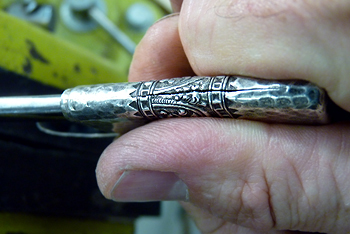
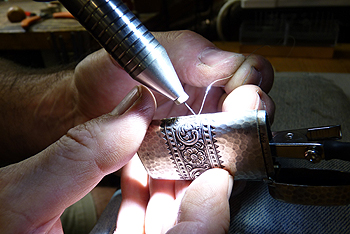
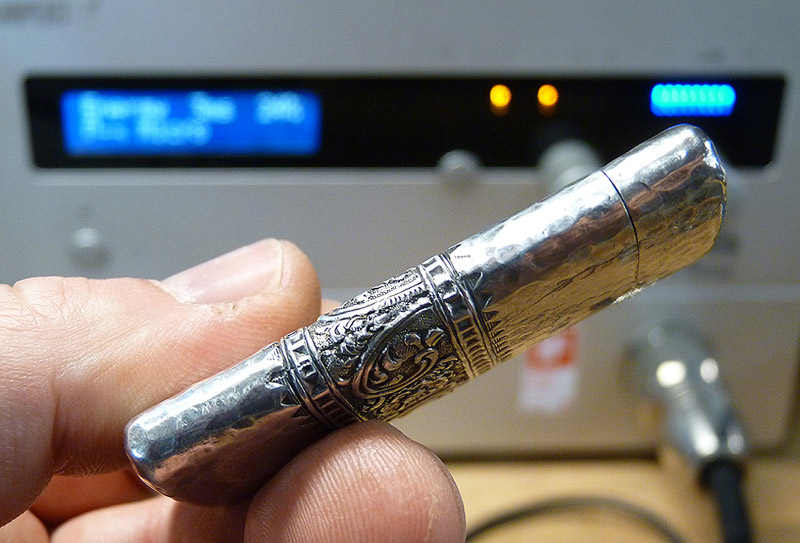
Here, a pulse arc welder is used
to close the seam. This technology enables me to use .005"-.010"
diameter sterling wire on this repair as opposed to brazing with
hard silver solder. Silver soldering would have taken much
longer: fluxing the piece to prevent firestain, clean-up of the
solder joint around the chased detail, and extensive repatination.
Pulse arc welding localizes the heat and surrounds the weld area with
argon gas. This gas totally eliminates oxides from forming in the sterling.
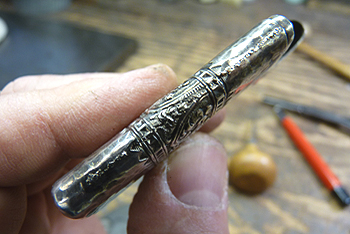
The joint after welding.
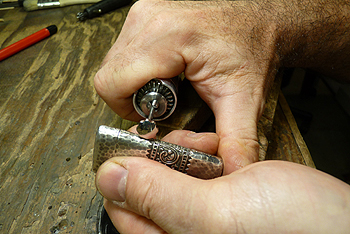
A rotary compactor is used to
hammer down and compress the sterling wire that was used for the weld.
A fine rubberized abrasive wheel
removes any compactor imperfections.
This is the result before repatinating.
PUK 3s Professional
9/22/2011: Sterling Pie Server
This problem normally would require me to remove the plaster from the
handle making sure it's perfectly clean before brazing. I would then
have to go in with a scraper and clean around the split to guarantee
a successful brazing job. Most handles I repair contain pitch which
would have to be fully emptied so to not contaminate the joint (Arc
welding and laser welding would have produced enough localized heat
to melt the pitch, contaminating the seam.) For this handle, I
experimented by removing only the plaster that was attached to the
underside of the ragged split (approximately 2" in length) and
left the remaining plaster in the handle. Also, I didn't remove the
solder from the seam - arc welding and laser welding technology
normally wreak havoc when working with solders, but I was curious to
see if the PUK would give me a different outcome. I cut a piece of
annealed .005" sterling sheet and used it as a shim in the
split, exposing about a 1/16" above and below the surface. I
then clamped the two sides together and began welding using the PUK's
gap filler mode. Positioning the electrode on the top edge of the
shim, I was able to melt and "push" the sterling down into
the split, successfully filling the most of the void. This process is
completed within milliseconds. I then used .010" annealed
sterling wire to fill any remaining voids. The end result displayed
absolutely no porosity and was undetectable. There was no
firescale or firestain to remove, no patina to be reapplied, and a
seam that would never split again.


 Standard
sterling
Argentium
Standard
sterling
Argentium